How to add Advanced Custom Fields (ACF):-
AS in a previous post discussed about basics of adding custom fields in wordpress post here we are going to discuss details about Advance Custom Fields
> Login to wordpress as admin user
> Install & activate the “Advance Custom Fields” Plugin

Once the plugin is activated “ACF” will appear in the LHS bar.
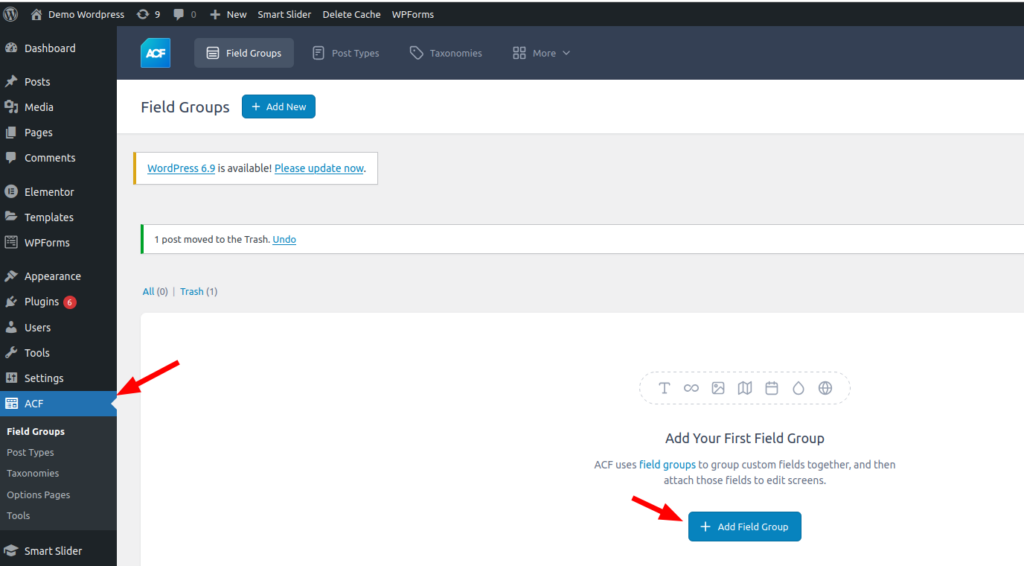
> Click on “Add Field Group”
> Enter Field Group name “Car Details”
> Then add a “Custom field” named “Brand” let the other settings as it is
> Then click on “Save Changes”
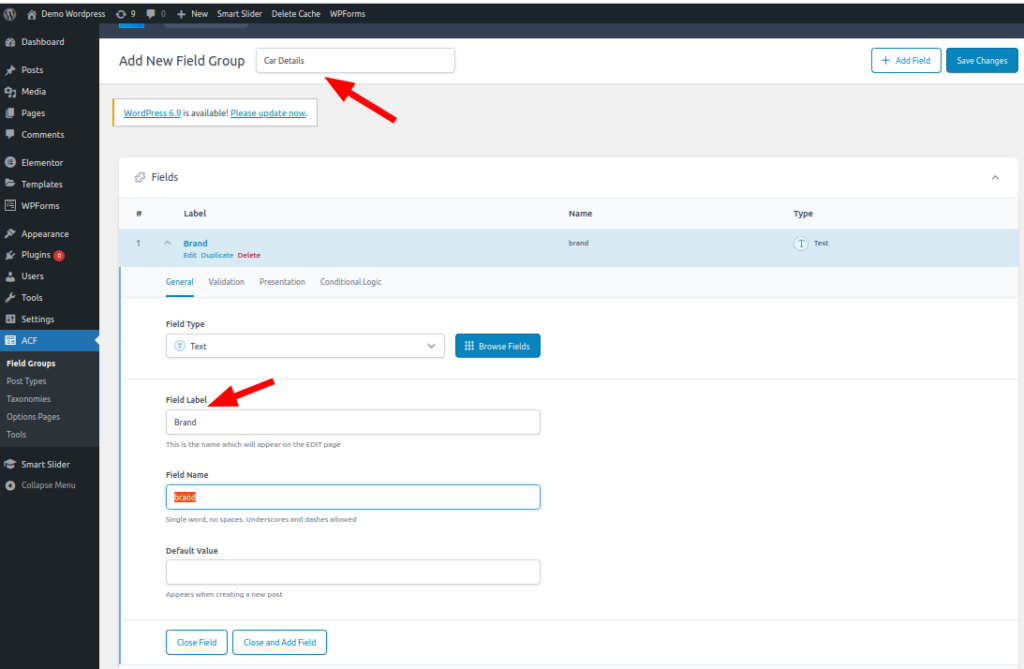
Brand field added as in above screen
Once you add a new post it will show the interface to add a custom field “Brand”.
Enter brand name as “Honda” and publish it
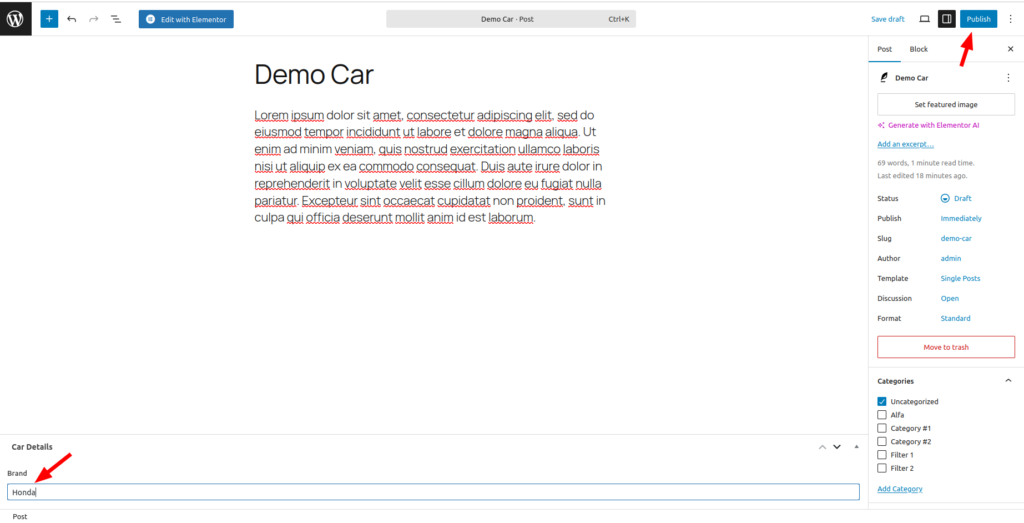
Then click on “Publish”
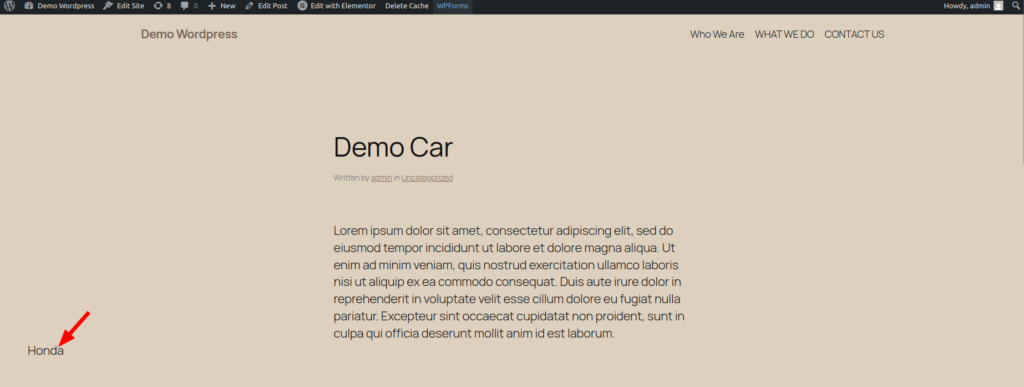
After publishing the post you will notice in view mode custom field “Brand” not visible.
Actually for showing these custom fields on post’s view mode it needs to add a shortcode in your theme’s functions.php file or in some custom plugin file. We have added in the custom plugin file.
function my_acf_field_shortcode($atts) {
$atts = shortcode_atts(
array(
‘field’ => ”,
‘post_id’ => get_the_ID(),
),
$atts
);
if (empty($atts[‘field’])) {
return ”;
}
return esc_html( get_field($atts[‘field’], $atts[‘post_id’]) );
}
add_shortcode(‘my_acf’, ‘my_acf_field_shortcode’);
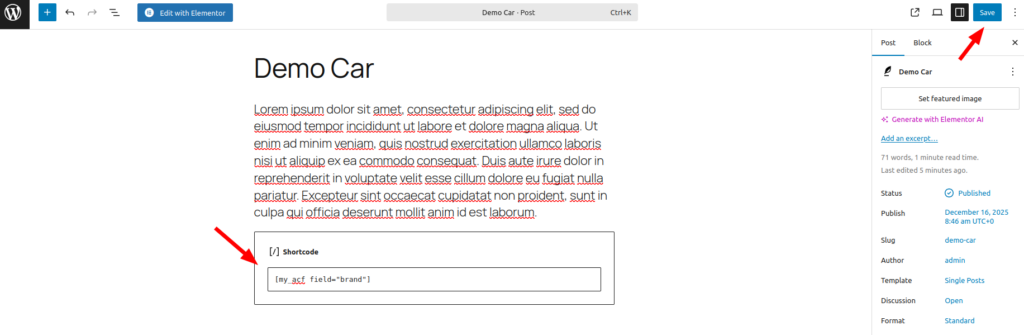
> Then add shortcode [my_acf field=”brand”] in edit mode of post
Finally view your post, you will see the “Brand” custom fields.